Installing QLink
QLink is not automatically installed with your eSignal or QCharts software. In order to use the QLink application, it must be downloaded separately by clicking here.
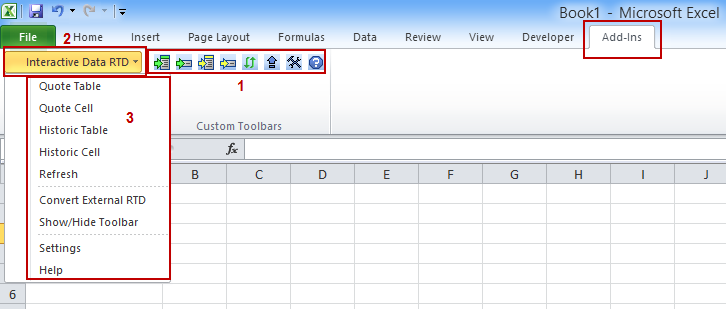
or
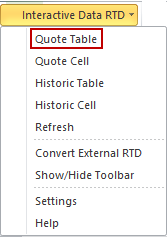
From the Excel Drop-down menu eSignal RTD click Quote Table:
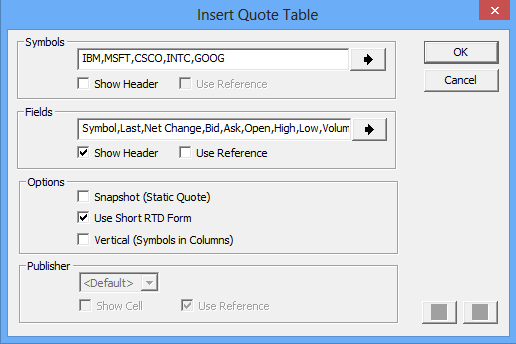
Fields: Heading to be added to the Quote Table, multiple headings can be added by separating with a comma.
Options:
Snapshot: Allows for static quote instead of real time streaming.
Use Short RTD Form: Uses an abbreviated formula for the RTD request.
Vertical: (Symbols in Columns) Changes the display of the request from a horizontal view to a vertical view.
Publisher: The RTD data source.
Show Cell: Creates a to display the source.
Use Reference: Reference a particular cell for each formula (See sample spreadsheet by clicking here).
Expanded Symbol List Selector
The expanded symbol list is a useful way to add multiple symbols to the symbol field. Click on the right arrow icon to display this function:
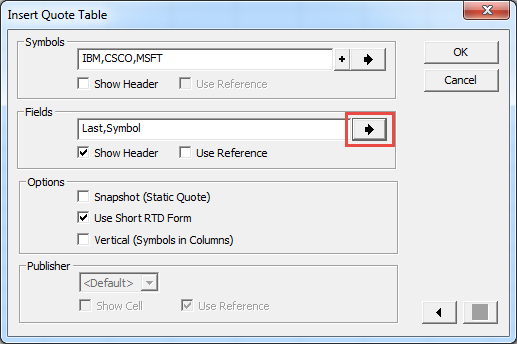
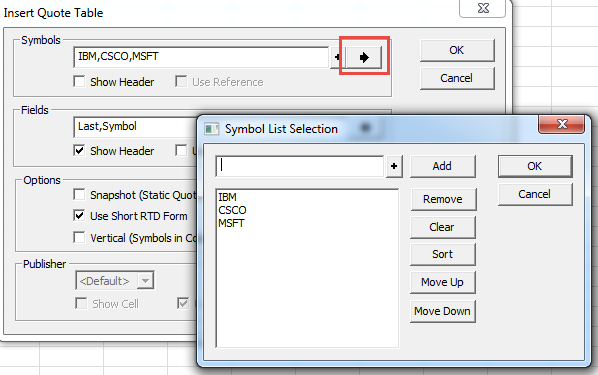
left-clicking the expanded symbol list icon
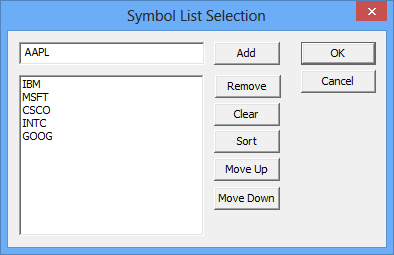
Add: Enter a symbol in the Symbol Entry box and click Add to select symbol.
Remove: Select a symbol from Symbol List and click Remove to delete symbol.
Clear: Clears the list of symbols.
Sort: Sort symbols alphabetically.
Move Up: Moves a selected symbol up the Symbol List, changing the order sequence it appears.
Move Down: Moves a selected symbol down the Symbol List, changing the order sequence it appears.
OK: Click to accept selection.
Cancel: Click to cancel selection.
Expanded Field List Selection
Expanding the Field list is a useful way to add headings:
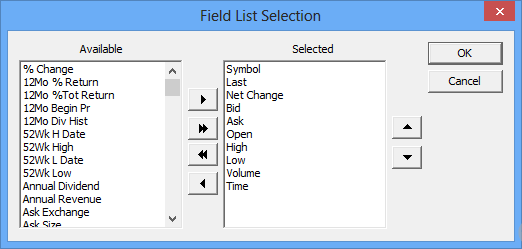
left-clicking the expanded field icon

Available: List of fields available.
Selected: List of fields already selected.
>: Select field and press to add to selected list.
>>: Press to add all fields.
<: Select field and press to remove from selected list.
<<: Press to remove all fields.
Move Up: Moves a selected symbol up the Symbol List changing the order sequence it appears.
Move Down: Moves a selected symbol down the Symbol List changing the order sequence it appears.
OK: Click to accept selection.
Cancel: Click to cancel selection.
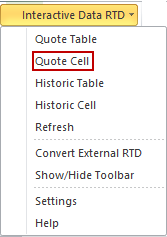
to access the quote cell request feature, click on the quote cell icon
or
From the RTD Command Menu select Quote Cell.
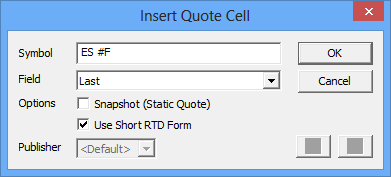
Symbol: Symbol to be added to the cell.
Field: List of fields available to select from.
Options
Snapshot: Select checkbox to have the RTD link in Snapshot Mode.
Use Short RTD Form: Uses an abbreviated formula for the RTD request.
OK: Click OK to create cell.
Cancel: Do not create the cell you have configured.
or
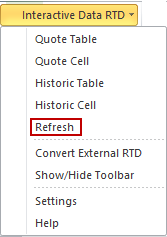
From the RTD Command Menu, select Refresh:
52 Week High Date
The history Data Table is used to create a table of historic prices.
History Request
Before clicking the button on the toolbar, select the cell in which you want the upper, most left point of the table to start from.
from the excel toolbar click the historic data table button
or
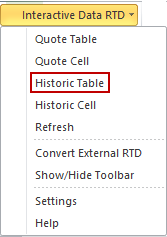
From the RTD dropdown menu click Historic Table.
The Insert Historical Table dialog box will then be displayed:

Interval: The time frame of Data. If selecting Intraday, fill in number of minutes in 2nd input box.
No Fill: Bars will be built from existing trades only.
Fill Forward: Will fill the gaps in time with bars created from the previous real bar (made from trades) before the hole.
Fill Backwards: Will fill gaps in time with bars created from the next real bar (made from trades) after the hole.
Fill Interpolate: Fills in the gaps intime holes with bars based on neighboring bars (the previous real bar and the next real bar).
Fields: Fields to be selected to put into a table. Multiple fields are separated by commas.
Series: Number of bars/rows of data to be returned. Series is counted from current bar backwards.
Options: Options on how the data will be displayed in the table.
Vertical: Select Vertical Display of the Data Table. Default is Horizontal Layout.
Reversed: Displays the data with oldest data at top of table.
Use Short RTD: Uses an abbreviated formula for the RTD request.
Show Cell: Displays the RTD data source.
OK: Click to execute the request.
Cancel: Click to disregard the request.
The expanded symbol list is a useful way to add multiple symbols to the symbol field:

left-clicking the expanded symbol list icon

Add: Enter a symbol into the Symbol Entry box and click Add to select symbol.
Remove: Select a symbol from Symbol List and Click Remove to delete symbol.
Clear: Clears the list of symbols.
Sort: Sort symbols alphabetically.
Move Up: Moves a selected symbol up the Symbol List, changing the order sequence it appears.
Move Down: Moves a selected symbol down the Symbol List, changing the order sequence it appears.
OK: Click to accept selection.
Cancel: Click to cancel selection.
Expanded Field List Selection

left-clicking the expanded field list selection icon
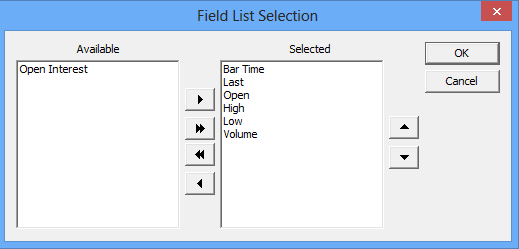
Available: List of fields available
>: Select desired field and click to add to selected list.
>>: Click to add all available fields.
<: Select field and click to remove from selected list.
<<: Press to remove all fields.
Move Up: Moves a selected symbol up the Symbol List, changing the order and sequence as it appears.
Move Down: Moves a selected symbol down the Symbol List, changing the order and sequence as it appears.
OK: Click to accept selection.
Cancel: Click to cancel selection.
History Data Cell
The History Data Cell feature is used to create a single RTD cell
from the custom toolbar click on the historic cell icon
or
From the RTD Command Menu click on Historic Cell:
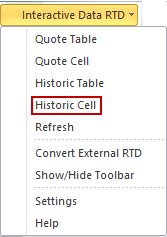
The Insert Historical Cell dialog box will be displayed:
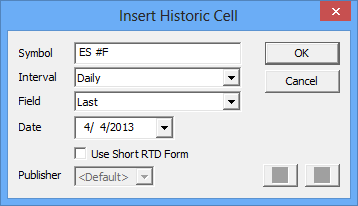
Symbol: Symbol to be used in cell.
Interval: Interval of Data. If selecting Intraday, fill in the desired number of minutes in 2nd input box.
Field: Fields to be used in cell.
Date: Date to be used in cell.
Use Short RTD Form: Uses an abbreviated formula for the RTD request.
Publisher: Select the RTD data source.
OK: Click to create cell.
Cancel: Do not create the cell you have configured.
List of fields available in the Historical Data Table and Historical Data Cell:
Date
Settings
Used for configuring the way the Date and Time will be displayed in the Excel spreadsheet.
from the custom toolbar click on the settings icon
or
From the RTD Command Menu click on Settings:
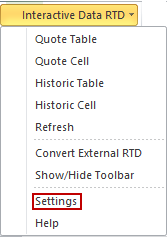
The Interactive Data RTD Settings dialog box will then displayed:
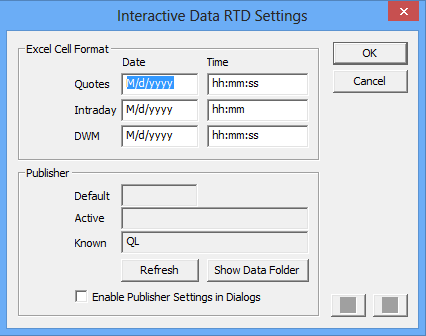
Excel Cell Format: Enter the desired Date and Time formats.
Publisher: Check Enable Publisher Setttings in Dialogs if a change in Publisher is desired.
RTD Cell Syntax
You can create RTD links by directly entering the RTD formula. Click here to download a sample spreadsheet for RTD formulas examples.
Simple Quote Format (Streaming Quote Only)
=RTD("ESRTD",,"<Symbol>","<Field>")
Extended Quote Format (Streaming or Snapshot Quote)
Snapshot (Static Quote) Syntax
=RTD("ESRTD",,"*S","<Symbol>","<Field>") - Snapshot Quote
=RTD("ESRTD",,"*H", <Symbol>,<Field>,<Agg>,<Start>, <Index>)
*H - Denotes History Function
Symbol - Symbol
- Open
- High
- Low
- Last
- OpenInt
- Volume
- Symbol
- BarTime
Agg - Data Interval/Aggregation
- D - Daily
- W - Weekly
- M - Monthly
I<n> - Intraday with specific number of minutes
Start - Starting Date (Optional). Default is current day
Index - Offset from Current Day. Default is Zero. Number of Bars prior to Start Date/Current Day
* Start and Index are mutually exclusive.
FAQs
How I copy columns from a Watch List window in eSignal 11 to Qlink?
Beginning with eSignal 11.6, you can copy columns from the Watch List window in eSignal 11. Click here for more information.
Does QLink support the Extended Intraday Data service?
At this time, QLink does not support the 12+ years of intraday data that comes with this service. This is on the development list to add to the product, however we have no accurate estimate to provide for when this will become available.
Is DDE or QLink supported with eSignal OnDemand?
Yes, DDE and QLink ($10/month) are supported functions of the eSignal OnDemand service. Please note that the QLink add-on (as with most OnDemand add-ons) is available only in USD (US Dollar). Customers billed in non-USD (EUR, GBP, JPY, etc) would need to switch to USD billing to enable add-on services to an OD account.
Troubleshooting
Are there any Firewall settings I should be aware of?
QLink follows the same port settings used for eSignal. Those settings can be found here.
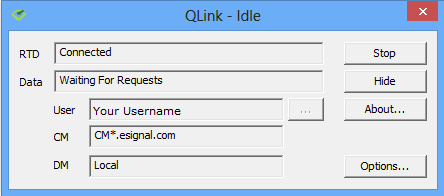
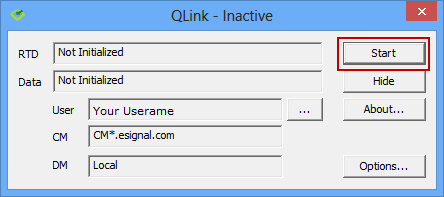
When I try and add the QLink Add-In I get an error message saying "Invalid Add-in":
With Excel 2010, Microsoft's Click-to-Run installer prevents the QLink 3.x plug-in from being added to the Excel Add-ins menu. Uninstall Click-to-Run and install Office 2010 using the instructions in the article.
I've installed QLink 3.x but the Toolbar isn't showing up in the Add-Ins menu?
Manually register/enable the QLink 3.x plug-in by clicking File, and then Options.
The Excel Options dialog opens up. Click the Add-Ins item in the list along the left edge of the dialog to see the Add-Ins panel. Make sure the Manage dropdown at the bottom shows Excel Add-Ins, then press the Go button.
That brings up the Add-Ins dialog. If the add-in for QLink does not appear in the list, click Browse, and use the Browse dialog box to locate the add-in file.
Browse to the file location for the QLink 3.x Add-In which is located in C:\Program Files\Interactive Data\RTD or C:\Program Files (x86)\Interactive Data\RTD with a 64-bit operating system. The file name is "ESRTDAddIn.xll". Just left-click on the file and then click the OK button.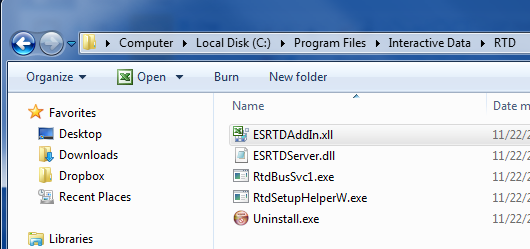
After clicking the OK button, the Add-Ins Dialog box will appear with the Interactive Data RTD Add-In listed. Make sure there is a check mark in the box next to Interactive Data RTD. Press OK.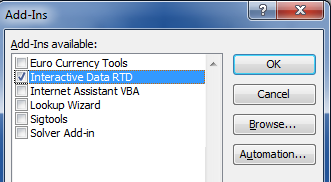
The QLink Toolbar will be located at the inside the Add-Ins tab at the top of Excel 2010.