Overview
The Futures Board window displays the current prices of the front month and a user specified number of the forward months of futures contracts.
The Futures Board window displays the current prices of the front month and a user specified number of the forward months of futures contracts.

Opening and Entering Symbols in the Futures Board
To open a new Futures Board, go to New on the main menu bar:
To open a new Futures Board, go to New on the main menu bar:

Then click on Futures Board from the dropdown menu:

Alternatively, the Futures Board window can be launched by right-clicking any symbol from another window (such as the Watch List window) and selecting Open in Futures Board.

Alternatively, the Futures Board window can be launched by right-clicking any symbol from another window (such as the Watch List window) and selecting Open in Futures Board.

To enter a symbol, simply double-left click in any cell, type the symbol and press Enter.

Right-Click Functions
Right-clicking the mouse inside one of the symbol cells in the Futures Board will display a menu of options to select.

Open In
By right-clicking on a symbol, you can open another window type for that symbol.

Open in Options Analytix
If you are subscribed to Options Analytix, you can open a window in it for that symbol.

Add Alert
Right-click on a symbol and select Add Alert from the menu. The Alert dialog box will appear to configure the Alert Condition, Rearm and Alert Action selections.

Click here for more information on setting alerts.
Order Functions
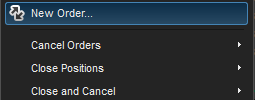
You can place orders, cancel orders, close positions from the Futures Board by right-clicking on the symbol.
Order Functions
You can place orders, cancel orders, close positions from the Futures Board by right-clicking on the symbol.

To place a new order, select New Order.

An Order Ticket be displayed for selected symbol.

After the order is placed, you can cancel orders if they have not been filled or close positions if they have filled, with a right-click selection.

Insert Splitter


Allows you to "split" up and label (preceding the label with the # sign) the Futures Board into sections. The section can be collapsed or expanded using the arrow to the left of the label.

Edit Functions
By right-clicking in the Futures Board window, you can perform generic edit functions such Inserting or Deleting a row(s), Cut, Copy, Paste, Clear and selecting All Items.

Find Symbol
Locate a symbol in a Futures Board window by selecting Find Symbol on the right-click menu or by pressing the F3 key on the keyboard.

A Find symbol box will appear. Type in the symbol and press the Enter key and the box for the symbol will be highlighted.

Insert List
Allows you to populate a Futures Board window with a list of symbols in a text file.

After selecting Insert List... , a dialog box will appear to browse for the file.

Style Templates
Selecting a Style Template allows you to customize a Futures Board window in terms of color, font, and indicators and more. Once you have customized your settings in the chart you can apply them as a default any new or existing chart by setting a Default Style Template.

Properties
Allows you to further customize the features of the Futures Board window.
Cell
Allows you to configure the font and colors of the cells.

Direction
Change the color and display of when a tick is up or down using this menu. The Color field allows you to choose a column (Symbol, Last, Change, All Cells) for the color display which is based on Net Change. Green (Up) indicates a positive change, Red (Down) indicates a negative change, and Gray (Zero) indicates no change. Tick Display allows you to toggle between using arrows or +/- for changes up and down.
Change the color and display of when a tick is up or down using this menu. The Color field allows you to choose a column (Symbol, Last, Change, All Cells) for the color display which is based on Net Change. Green (Up) indicates a positive change, Red (Down) indicates a negative change, and Gray (Zero) indicates no change. Tick Display allows you to toggle between using arrows or +/- for changes up and down.
The High/Low Highlight section enables the High, Low and/or Last, fields to be highlighted when a new session high or low value is hit.

Layout
Allows you to configure the font and colors of the window.

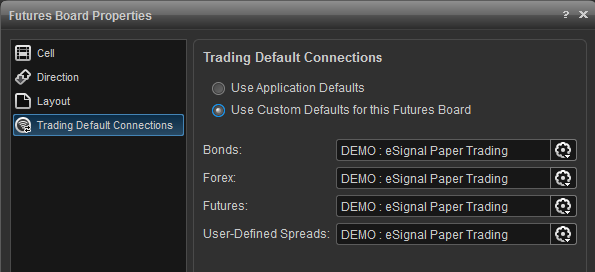
Trading Default Connections
Allows you to set the default trading connections for each issue type for the Quote Board window.
